I created a fun, sparkly card using the Die'Sire Edge'ables Borders Renaissance die.
I grabbed some 8x8 Shimmering Gold Dust Cardstock and cut it to 4.25 x 5. I placed it on the edge of the panel and held it down with washi tape. I ran it through my die cutting machine.
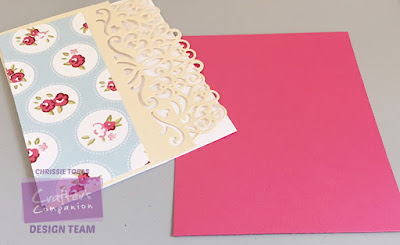
This is what it looks like:
Then I cut a piece of white cardstock to 4.25 x 11 and scored it at the 5.5. I also cut a piece of patterned paper from the Sweet Treats pack to 2.25 x 5.25.
Then, using an X-Acto blade, I trimmed off part of the front of the card base. I took off enough to leave about 2.5 inches (I trimmed it down further after I took this picture).
I cut the Rose Pearl to fit in the inside of the card. Having multiple layers makes this card nice and sturdy!
Next, I placed the front panel down onto my surface and made sure it was protected.
First, I added some Magenta Stickles to the die cut area. Once it was dry, I added the Golden Rod. I added two colors to give a little more interest to the card.
To create a custom tag, I die cut a rectangle using the Die'Sire Essentials Rectangle out of Gold Dust. I stamped the sentiment from Die'Sire Sentimentals Nature EZ Mount Stamp set and distressed the edges.
To finish everything off, I cut a few strips of ribbon (shaped like roses) and tied some twine on it. I then attached the tag to that twine.
I adhered the ribbon to the front of the card!
The finished card has so much texture from the multiple Stickles and ribbon!

SUPPLIES:
All supplies available on the Crafter's Companion Website and linked above.
Let's Connect!


No comments:
Post a Comment
Thank you so much for commenting!!! :)