Showing posts with label Die Cuts. Show all posts

Tuesday, August 14, 2018

Hop Along With Gina K and Therm O Web!

Hi! Welcome to the Therm O Web Gina K. Designs Blog Hop! You should have arrived here from Audrey's blog!

I had so much fun making these cards.  I love everything Fall-themed, so this release is right up my alley!  I even made a video, sharing how to make the "Thank You" card! Just scroll on down past the pictures to watch!


How amazing is this Thankful Leaves collection?!?! I think the foiled veins in the leaves are just stunning.  My full supply list is at the bottom of this post, if you want to see everything that was used!


This is the Graphic Flowers collection.  I love this set because it's very versatile.  It can be used for all seasons (who says we can't turn that flower into a poinsettia?!?!!)!


If you want to see the collections in act, watch my quick video!


GIVEAWAY TIME!!!!
We will pick a random blog and then a random winner from two blogs, so make sure to hop around and comment on each blog on the list! You will have the chance to win either the Graphic Sunflowers or the Thankful Leaves set.  PLUS, you will win adhesives, cardstock and Fancy foils (prize valued at $100)!!!!
The Therm O Web blog is also running a contest, where you can win the ENTIRE COLLECTION (valued at over $150)!!! To win this prize package, head on over to the blog, and visit the Instagram page for more chances and their Facebook page and YouTube channel. To be entered, you MUST Subscribe/Like/Follow!!!!

Gina K. will be hopping as well and offering a gift certificate! So, don't forget to visit Gina's blog!


Thanks so much for stopping by! Good luck!


Blog Hop List:
Audrey Eckstrom Pettit
Chrissie Tobas (YOU ARE HERE)
Gracie Chavez
Juliana Michaels
Katrina Hunt
Larissa McConville Heskett
Rebecca Keppel
Shemaine Smith


SUPPLIES:

Supplies Needed:
Gina K Designs Thankful Leaves Collection
Gina K Designs Graphic Flowers Collection
GINA K. DESIGNS FANCY FOILS™ 6" X 8" • SWEET MANGO
Gina K Designs Inks Black Onyx, Sandy Beach, Charcoal Brown
GINA K. DESIGNS FANCY FOILS™ 6" X 8" • GOLD SEQUINS
FOIL LAMINATOR • 12 INCH
DECO FOIL™ PARCHMENT PAPER
3D WHITE FOAM SQUARES • COMBO PACK
MEMORY TAPE RUNNER XL
PURPLE TAPE


Let's Connect! 


Tuesday, November 10, 2015

Festive Wonder!

Hi!
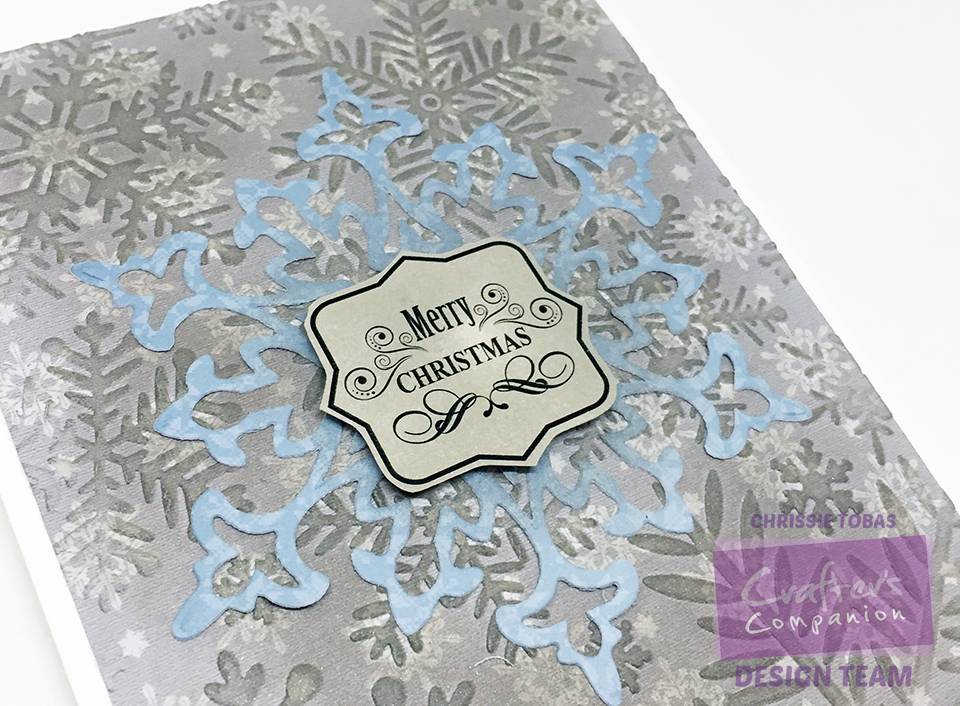
Today I'm sharing a fun project I created with the new Festive Wonder Range, which is out today!!! Sara Davies has created her own Signature Collection and it's fabulous!


I've used the Festive Wonder 6x6 Paper Pack, the Festive Flake Die (LOVE THIS!), the Festive Wonder stamp set and the Snow Flurry Embossing Folder to create this card.


After I embossed the patterned paper, I added a little Pumice Stone Distress Ink to make sure those beautiful snowflakes showed up!

Don't forget that Sara will be back on HSN this week AND we are celebrating Birthday Week at Crafter's Companion! Check out the Facebook page for all of the fun details - there will be chances for you to win!!!!


SUPPLIES:

All supplies available on the Crafter's Companion website and linked above!


Let's Connect!


Thursday, December 18, 2014

Inlaid Die Cut Tutorial

Hi! Today I wanted to share how I created this card using Inlaid Die Cuts with some products from Crafter's Companion. This is a really simple technique, but it gives a big added pop to your projects! Below is the card I created with the inlaid die cutting technique. See how the die cuts add something special to the card?!


First up, I pulled out my Die'Sire 3D Delicate Flower Die and laid them out on the Kraft cardstock panel (cut to 4 x 5.25) where I thought they would look good.


I taped them down with some washi tape (this is not required, but suggested - I just didn't want anything to move at all).


And here is what the panel looks like with the items die cut, but left in place:


Next up, I adhered the panel to the cardstock base and then glued down the die cuts.  I used my extra strong tape runner, but any permanent adhesive will work.  Just be careful if you use glue - you don't want any excess to come through, especially if there are holes (like the flower below).


Next, I stamped this darling wine and grapes image from Sheena's A Little Bit Scenic: Provence onto white cardstock.  I used Memento Tuxedo Black Ink.


I used Spectrum Noir Markers IG1, LV2, TN3, DR6, DG2, DG3, TN4, DR7 to color everything in. These are the only alcohol markers I use because they make me look better than I really am! :)


Once it was colored, I fussy cut the image out.


I inked up the sentiment and stamped it onto the card base.


I added foam adhesive squares to give the image a little dimension and added it to the card.


Here is one more look at the finished card:


I hope you will give this technique a try! Thanks for stopping by!


All supplies linked above and available in the Crafter's Companion store unless otherwise noted.


Follow Me!
Follow on Bloglovin
 

Sunday, January 26, 2014

Friends Like You!

Hi!
I created this sweet card using one of my favorite Crafter's Companion Stamp Sets: Sheena's Wild Rose and Hibiscus.  I am always looking for a reason to use it!


I stamped (Tuxedo Black) the image and then colored it in using my Spectrum Noir markers (CR1, CR4, CR7, LG2, LG4, LG5, CT3, IG1) and then die cut it. After that, I die cut the same image, but this time I also cut out a circle in the center and adhered them together.

The stunning lace on the bottom is from Stamp It Set 63 (Ornate Accessories) and the sentiment is from Sentimentals Imagine.


Thanks for stopping by!


All materials can be found on the Crafter's Companion Website unless otherwise noted

Dies: Spellbinders, Lawn Fawn
Paper: My Mind's Eye


Follow Me!
Follow Me on Pinterest