Showing posts with label Sewing Chic. Show all posts

Friday, March 8, 2013

SP & Company Crop - Resist Embossing

Hi!
Welcome to the SP & Company online crop! I hope you are having a good time! I want to share a technique that I use pretty frequently called resist embossing.  It's very easy to do and gives you a very cool effect on your projects.

You will need:
Versamark ink (or another slow drying ink)
Embossing powder
Heat Gun
Stamps
Distress ink or markers or watercolors

In my first shot, you can see that I'm using this little chalker.  This, by no means is a required tool! But if you use it and tap is gently on the paper before you emboss, you will end up with a cleaner embossed image and less extra little flakes left behind.


After I've chalked up my paper, I stamped my image in VersaMark.  You don't have to use VersaMark (also known as watermark ink), but you will have to use a slow drying ink so the embossing powder has something to adhere to.  This dress form stamp is from the Sewing Chic set.


I use a coffee filter to protect my area from the white embossing powder.  I do have a catch tray, but this is easier to dump back into the container.


I gently flick the paper with my fingers to remove the excess powder.  You can also use a paintbrush to remove and other extra powder.  Then I use my heat gun to emboss the powder.


I broke out my distress inks and I stamped onto a small acrylic block.


By using a paintbrush with the distress ink and a little water, you can see what I created below:


I just brushed over the image.  Since it is embossed, it will resist the ink (hence the name of the technique)! You don't have to use distress ink and water, either.  You can use regular inks, paints and even markers (I just water them down a little bit)!

Here is the finished card:


I added some sequins and a sentiment from the new set that comes out on March 10th called Certified Awesome Additions.


For my next project, I also used the same technique, but this time I used a colored embossing powder instead of white and I just rubbed ink onto the card instead of using a paintbrush.


I used Chevron Chase Background for this card.


I just took my little sponge tool and rubbed the ink over the top of the card, using more at the top and less as I went down to create a slight ombre effect.  I also used a paper towel when I was done to wipe off the excess ink.  This makes the yellow embossed design pop a little more!


Here is the finished card.  I combined Certified Awesome with Certified Awesome Additions.


I also sprayed the card base with some mist, just to create some extra interest.


I hope you will give this technique a try! We have different techniques and projects happening today and tomorrow (with Sunday to work on them all), so make sure to check out the SP & Company Facebook page and the BLOG for all of the details and inspiration!!!


Stamps: SP & Company
Embossing Powder: Ranger, Zing
Spray: Studio Calico
Inks: VersaMark, Memento, VersaMagic, Tim Holtz Distress Inks
Sequins: Making Memories

Saturday, September 15, 2012

You're Chic!!!

Hi! I hope your weekend has been fabulous so far!

Speaking of fabulous... I have a 'chic' card to share today!


I did some 'selective' stamping for the title onto the Boutique Sign Mini Stamp.  What's selective stamping you ask???!!! Well, it's when you only ink up (or mask off) part of a stamp.  You can also cut apart your stamps, too, if you prefer.  While there is NOTHING wrong with cutting stamps apart, sometimes I just can't cut those beautiful stamps up!

Here is how I selectively stamped this one:


I chose a mini ink pad with a teardrop edge so it was easier for me to only use part of the sentiment (You're Sew Special sentiment from Sewing Chic).


I also stamped Chevron Chase in the background, so the sign was a little more eye-catching! I also added a light tan ink onto the sign so it wasn't a bright white - I wanted it to 'fit' into the card more.


One of the things I love about the Stitchery Doo Set is the stitches and how easy they are to stack up together!


I thought it would be fun to align the three different stitches together and stamp them to break up the top from the bottom of the card.  And it is a time saver, when I can just stack them together on one block!

Thanks for stopping by today!!!


Thursday, June 21, 2012

SPLAT!!! Using Splatters on Cards!

Hi!
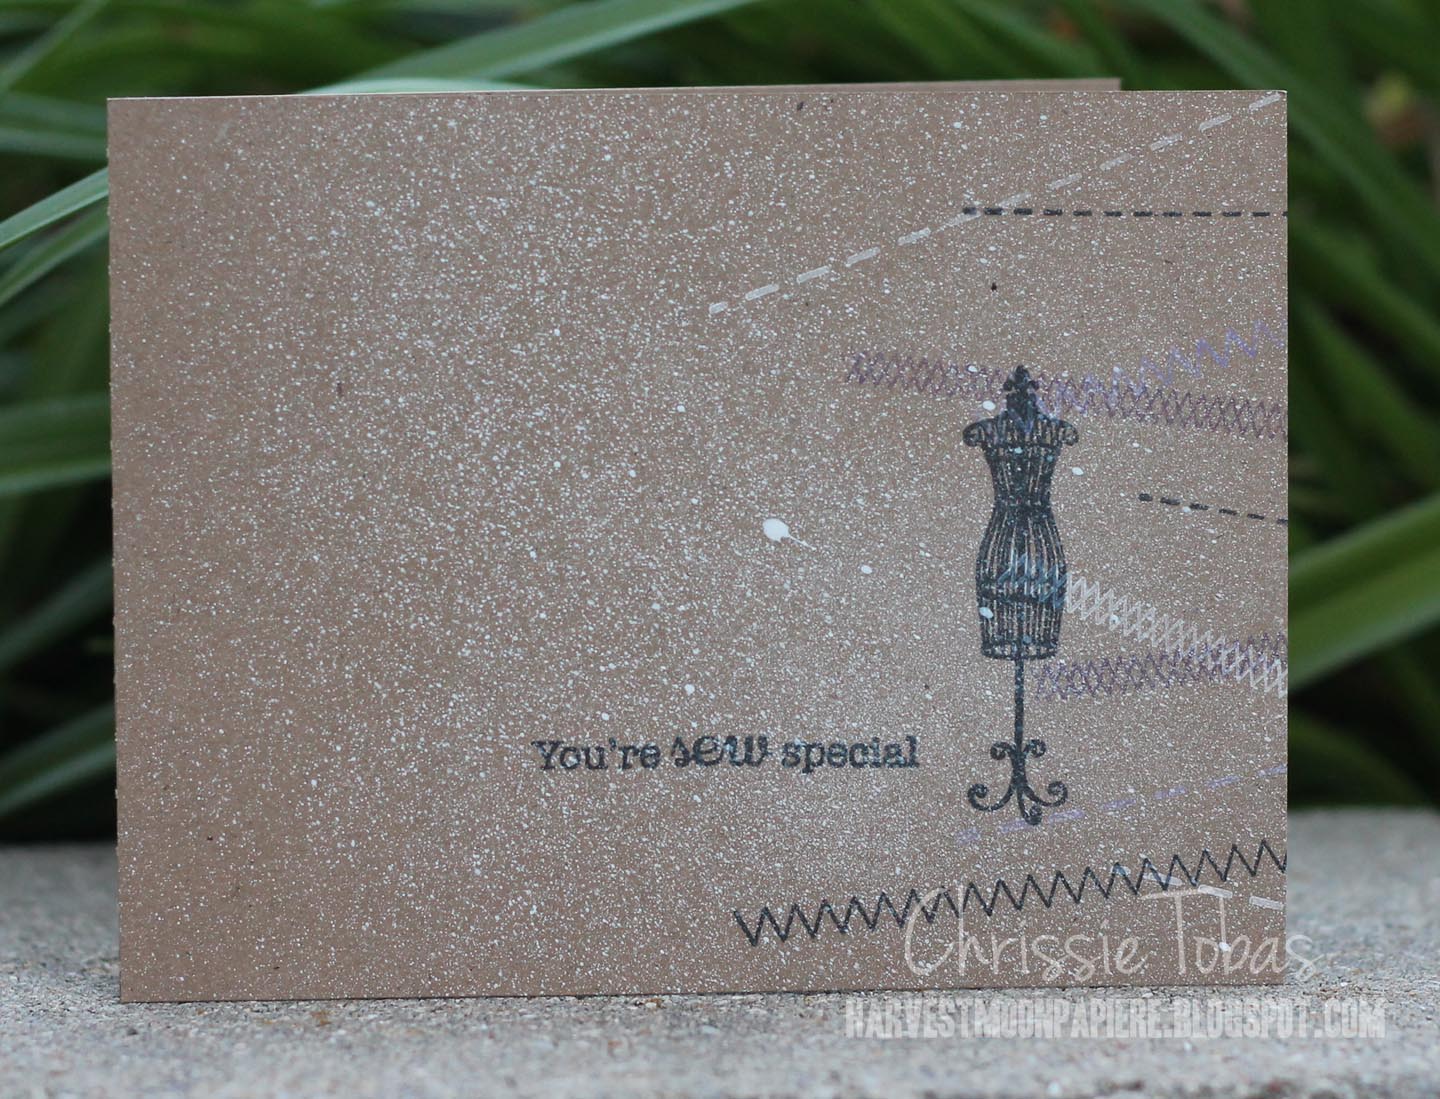
Today I have a simple but fun card to share with you! I used some spray mists to create a splattered look over the stamped images and sentiment.  First, I stamped the stitching from Stitchery Doo in 2 shades of purple and in white.


I came back in with the dress form and sentiment from Sewing Chic and stamped them both in black ink.  This set is an oldie, but a goodie, and one of my all-time favorite stamp sets.


Once I had everything stamped, I gently shook my spray mist bottle and sprayed it once over the card.  I love those little splatters that popped up!!!

Thanks for stopping by today!


Stamps: SP & Company
Ink: Memento, Hero Arts, VersaMagic, PTI
Stock: Recollections
Spray Mist: Studio Calico

Wednesday, February 22, 2012

Vintage Style

Happy Thursday!
One of my favorite SP & Company stamp sets is Sewing Chic.  I just love those dress forms! Today I have a card that showcases those forms.  It's super CAS, but I love the way it came out.


I used a Tim Holtz edger die for the card from and a simple PTI sentiment.


I used dimensionals to have 3 of the images pop up on the card and I inked all of the edges.  I think the pink and gray together just makes the card more classy - I like that combo!


Thanks for stopping by today and make sure to check out the SP Blog to see what the other SP Design Team Divas have for you today!!!


Cardstock: PTI
Stamps: SP & Company, PTI,
Ink: Memento
Other: Fiskars Finger Trimmer, Tim Holtz edger die, SU Dimensionals


Thursday, January 26, 2012

SEW Chic!

Hi!
Today I have a really pretty card for you today.  I decided to stamp on canvas, which I love doing (but I tend to hoard my canvas, for shame!) and I wanted to use some Authentique papers that are just soooo chic!
After I stamped on the canvas, I frayed the edges and inked them up.  I also sewed a bit on the side - how could I possibly use a stamp set called Sewing Chic and not sew, right???!!!


I also cut out those flowers from card stock - I just thought it needed something up in that corner!

Thanks for stopping by today! And make sure you pop on over to the SP Stamps Blog to see what new tip or technique you might learn!!!


Cardstock: Recollections,Authentique
Stamps: SP & Company
Ink: VersaMagic, Memento
Other: Button (Paper Studio), Singer Sewing Machine