Showing posts with label Lovely Labels. Show all posts

Thursday, September 27, 2012

Poppy Field FALL!

Yep, you read that title right.  Poppy Field SUMMER is becoming Poppy Field FALL in this post! I'm here today to show you a pretty Fall card I created with a simple Post It Note mask.

I stamped the Lovely Labels frame onto a Post It Note and I punched out the center circle.  Then I stamped it again onto my patterned paper.  I lined up the punched/open area on the Post It to the stamped image and then I stamped the image from Poppy Field Summer onto it.  By using the Post It, it 'masked' out the part of the image I didn't want and only the partial image showed up inside the framed.  Cool, huh? That extra step of creating the mask on the Post It is totally worth it! And if you want to see more samples of masking, HERE is a picture tutorial on Sami's site that shows how to mask, step by step!


After I stamped the image, I outlined the poppy with a gray marker, just to make it stand out a little bit.  Then, I simply added some twine and stamped the cute sentiment from Stitchery Doo Banners down at the bottom to complete the card.


I think the masked image along with the light outline really gives that poppy some pop!!! Thanks for stopping by today!!!


P.S. Don't forget to apply for the SP Design Team! The calls ends on the 30th of this month! Deets HERE!


Tuesday, August 14, 2012

A Watercolor Thank You Card!

Hi there! Today I have a beautiful watercolor-type card for you!!! I used my ink pads instead of watercolors.  All you need are some ink pads, a cup of water, a cheapie paintbrush and some plastic or acetate to stamp on and use as your pallette.  I was using a acetate sheet for a long time until I saw someone use an old CD case a few weeks ago.  I happened to have one, sitting in my scrap studio, collecting dust, so I inked it up!


Just stamp onto the plastic.  This will be your ink pallette.  I have a cup of water (the Yankees cup is my husband's - I like the Yankees, but I'm a White Sox girl!!!), a paintbrush and some stock that was cut to size.  I also inked up the Poppy Field Summer set with VersaMark and heat embossed some images in white embossing powder.


Dip your brush in the water and then into the first ink color you want.  I just added the ink to the image in a circular pattern.  I started out with the lightest color at the top and worked my way down.  The embossed images magically appear as you paint on the stock!


You can see my little work in progress above.  The best part is that it is really easy to clean up afterwards! I also took a tissue and wiped away the excess ink on the white embossed images.


I die cut a window and placed the 'watercolor' piece behind it.  I finished the card off with the "Thank You" sentiment from Lovely Labels.


Thanks for stopping by!!!


Friday, August 10, 2012

Stamp Kissing

Hi!
Today I have a beautiful card to share with you!  I used Poppy Field Summer (which is brand spankin' NEW) and I used the stamp kissing technique (Bold Houndstooth).


What's the stamp kissing technique? IT IS SO EASY! All you do is ink up one stamp (preferably one that is fairly solid).  Then choose another stamp and ink it up in a different color (preferably a patterned stamp).   Now, gently press that inked up patterned stamp onto the first solid stamp.  Then stamp your image onto your stock.  The pattern should show up onto your stamped image.  Cool, huh? That's how I got the houndstooth pattern onto the poppy.  L-O-V-E!


Thanks for stopping by! Don't forget to particpate in the Yellow Challenge - check out the details on Sami's Blog.  You could be a Guest Designer with SP!!!!!


Thursday, March 29, 2012

Creating Banners

Hi!
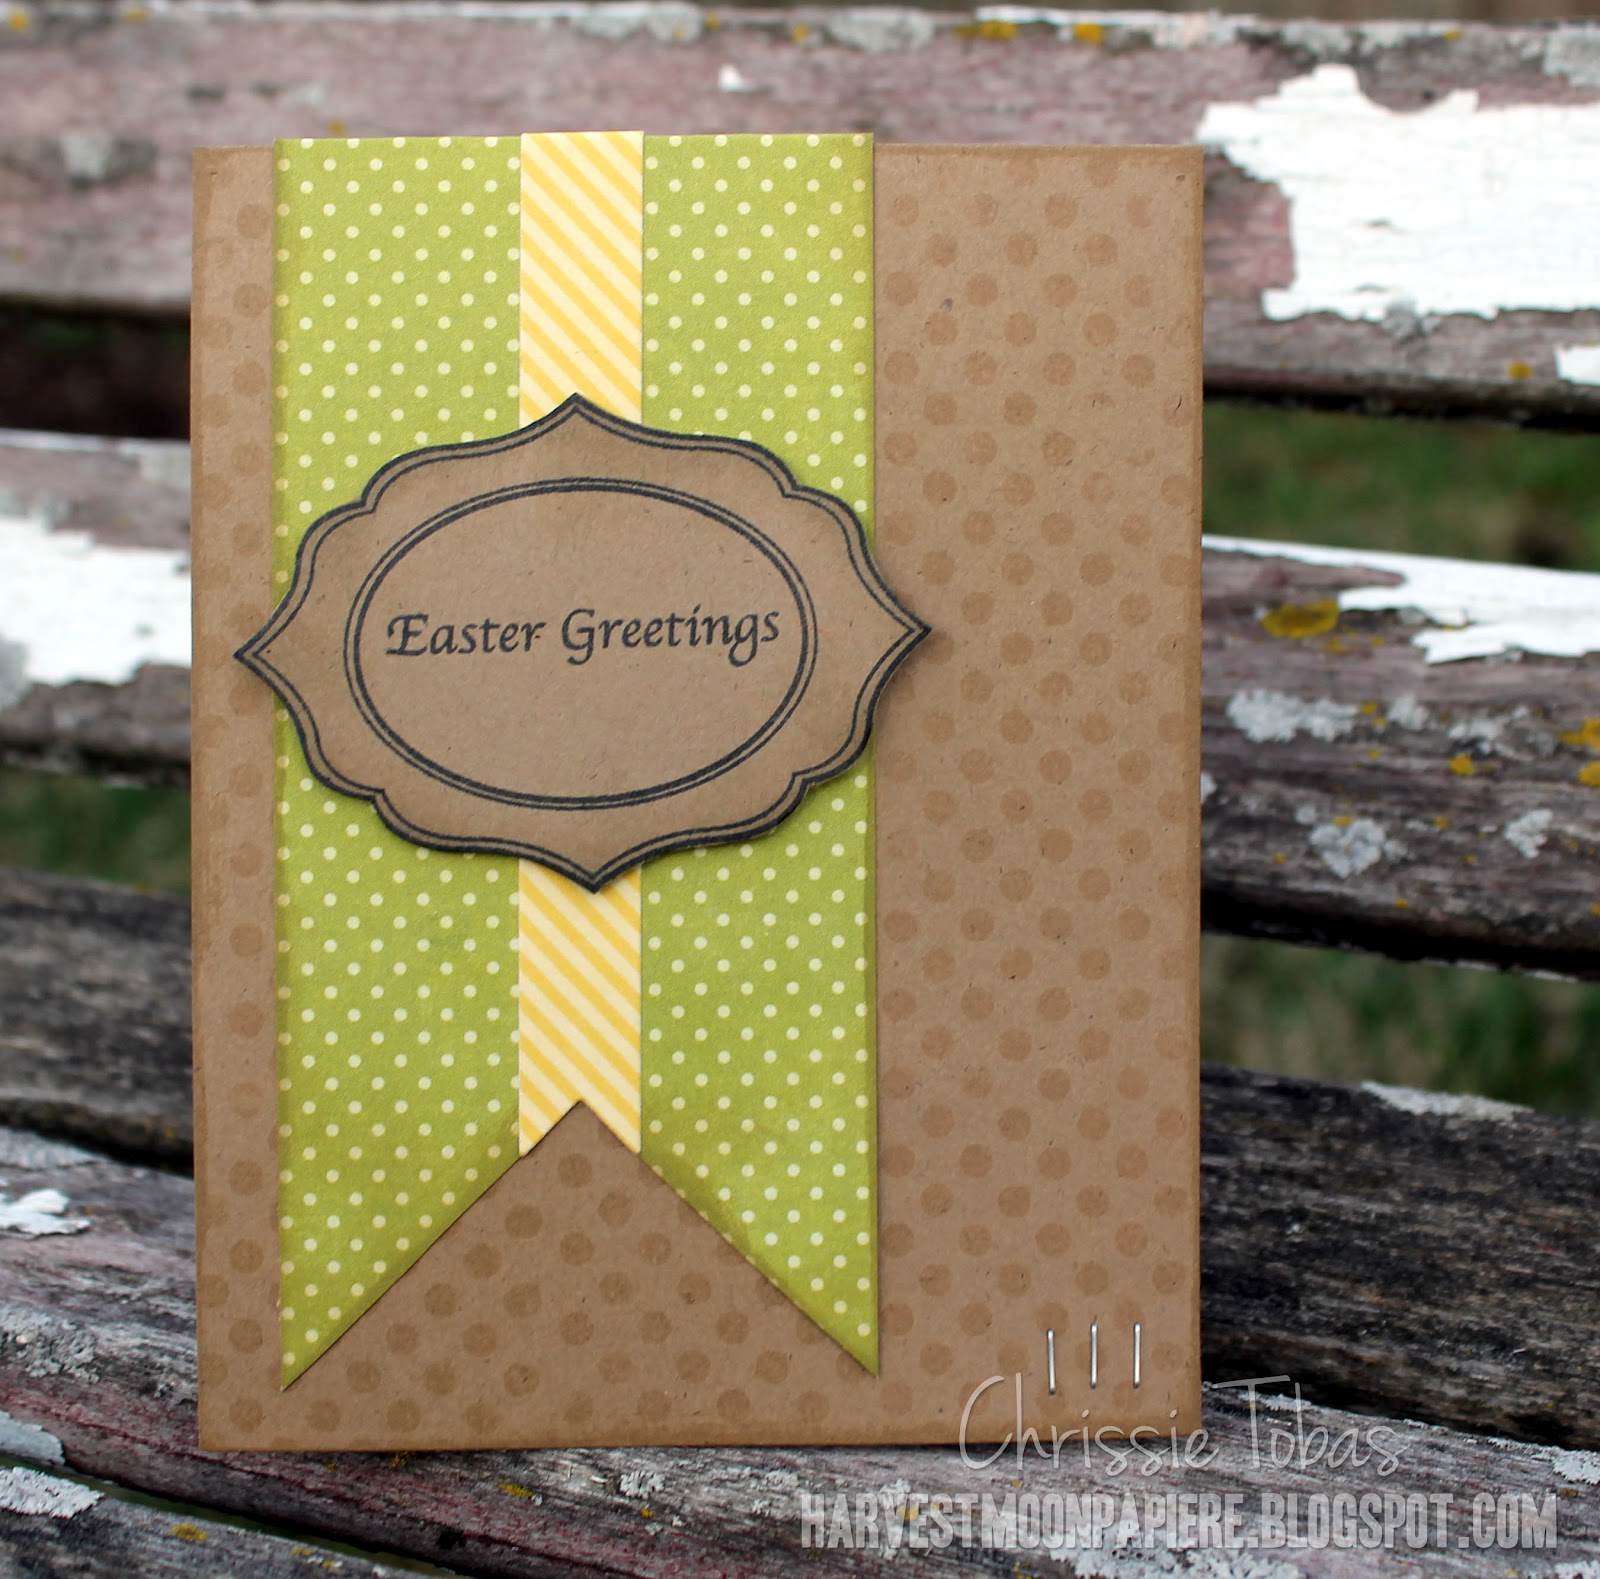
Today I want to show you how I create those fabulous trendy over-sized banners.  I know there are dies out there for them, but why waste the money when you can just do it by hand? It's really quick and easy.  All you need is a ruler, paper trimmer, pencil (or pen) and scissors.


Trim your paper to the width and length you want.  Flip your paper over.  Simply measure up from the bottom where you want the tip of the banner to be and draw a light line.  I measured an inch and a half.  Then, find the center of your paper and make a little mark.  Just connect that point with the lower corners.


Cut on the lines and flip your banner over.  If you plan on using this size frequently, use this as your template for future projects - you can just trace the points and cut them out - no measuring required!!!


To complete my card, I stamped Large Polka Dot Background in the background using some lighter brown ink.  I also inked up the edges of the banner using that same ink.

I thought it would be really cool to divide the banner, too!


So, I also made a smaller banner strip and placed that in the center.  I love the stripes and dots together.  They are both from Echo Park.

To finish up the card, I stamped the oval image from Lovely Labels and then placed the sentiment from Easter Eggy inside of it.  I simply inked the edges and adhered with pop dots.


I hope you'll give this banner technique a try! Thanks for stopping by today!


Stock: Echo Park, Recollections (Kraft)
Stamps: SP & Company
Ink: Memento (Black) Papertrey Ink
Other: Tim Holtz Tiny Attacher

Monday, January 9, 2012

January Blog Hop and Reveal!!!

Welcome!!! I'm so excited you are here today!

This month's color is WHITE (or Cream)! After you're done hopping around today, make sure you play along with this month's White challenge (click here for details) for a chance to win some awesome SP and Company prizes!

Join us for our Release Celebration that is happening today and tomorrow on the SP Forum HERE.  You can talk to all of the designers, discuss projects and chit chat with other stampers!

Don't forget that the random prize patrol is watching so leave a comment on every blog to be eligible for the prizes!!

Today I have three different projects for you, all using the newest stamp set, Large Polka Dots.  For my first card, I stamped the dots on vellum and heat embossed them.  So fun! I just love this look!!!


I stamped Lovely Labels on Echo Parks's Love Me Papers (I am seriously in love with these papers.  I can't stop using them).  I also heat embossed the sentiment from Artsy Heartsy on a banner I die cut.


Oh, and that beautiful flourish at the top and bottom? From Stitchery Doo!!! To keep the vellum adhered to the card without it really showing, I adhered behind the label and then stitched it down so the edges didn't curl up.  I love vellum, but it can be tricky hiding the adhesive!

Now, onto my next card using Large Polka Dots:


I heat embossed again, this time on plain white stock.  I've been waiting for a Polka Dot Background Stamp like this for a long time, so I was giddy when I saw SP was releasing one! This is just so versatile! I've been using it on so many projects!


I die cut the window using Spellbinders dies and stamped the heart and heart outline from Artsy Heartsy under it.  I adhered the embossed sheet with Stampin' Up Dimensionals after adding the fabric tape and Baker's Twine.

Now, for my last card.  This one is super CAS, but I really love it! It's not often I allow myself to be THIS simple and I'm so glad that I did.  I adore the results!


That Lippy stamp is just too great and the Large Polka Dots make this so graphic and clean! That sentiment is also from Artsy Heartsy.


Now, head on over to the SP and Company store before these stamps are gone!!!!


Make sure you check out the SP Blog to see what Samantha did with the new stamps! We also have the Stamp Team and the Challenge Team teaming up today to show you lots of amazing projects with the newest stamp sets!

Here is the list of designers that will inspire you today:

Chrissie
Lori
Britt
Jen
Kelli
Patchi
Patty
Stephanie
Susan
Tella

Thanks for stopping by!


Stock: Echo Park, Papertrey Ink (White), Vellum Unknown
Stamps: SP and Company
Ink: Memento, VersaMagic, ColorBox
Dies: Spellbinders, PTI
Twine: Martha Stewart
Fabric Ribbon: Making Memories